3 Indoor Fashion Photography Lighting Tips You Need to Know
LifeStyle Jun 13, 2020
As creatives, we fully understand that being stuck at home for the past few months during the COVID-19 pandemic has been tough. Between cancelled events, workshops, and shoots and our world suddenly shrinking down to the four walls of our house, we get it: Finding inspiration and room for creative expression in recent times has been a challenge.
Having said this, we’re also eternal optimists, and are looking at this time as an opportunity to improve our skills and hone our craft. This attitude can be applied to any creative activity, from cooking or drawing to indoor fashion photography. To explain how you could use this time to perfect your fashion photography at home and master indoor photo lighting, we’ve teamed up with the photography experts Ted’s Cameras. Read on for their 3 tips for lighting photos at home and improve your fashion and general photography today!
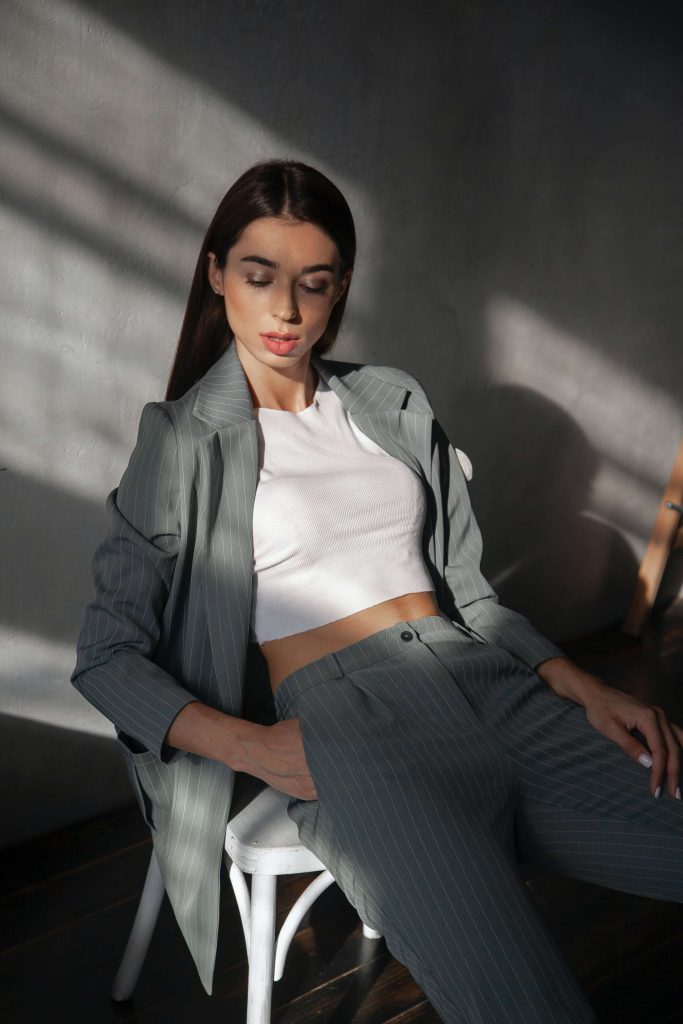
1. Make the most of natural light
The best light is natural light, and it doesn’t cost a cent! If your home has well-positioned windows that catch the sun, you can easily use them to light up your indoor fashion photography.
To set yourself up, follow these easy indoor photo lighting tips:
- Throw open the curtains and blinds to let the sunshine stream in. This goes without saying, but the sun is a fantastic light source. As a bonus, you or your makeup artist can stick to natural-looking makeup to match.
- Try to shoot during the day when the light is at its brightest. Depending on the direction the windows are facing, this could be in the early or mid-morning or the afternoon.
- Place your model, mannequin, or the items you’re shooting close to the window. This is especially helpful if it’s a little dreary or overcast outside, and the natural light isn’t as good as you’d like.
- Use a reflector to direct natural light towards your subject. This nifty lighting tool for photography prevents you from ending up with shadowy photos. It’s a budget-friendly way to brighten up your photos – and you can use it when you’re working with artificial lighting for photos at home, too! A bounce card will also do the trick.
2. Use a single light source
As a fashion photographer, you’ll often find yourself shooting in scenarios where natural light photography simply won’t be possible. Perhaps you’re shooting outdoors at night, or in a dimly-lit location without a consistent light source. In any case, taking photos indoors in low light is a skill that’s well worth getting the hang of.
When shooting at home or in other environments with inconsistent lighting, it’s a good idea to avoid your camera’s built-in flash. In these environments, it tends to produce dark shadows that give you much more work to do in the editing stage. Instead, opt for artificial lighting.
There are plenty of options to play around with for your fashion photo shoot lighting, but the good news is that you only need one artificial light source to get the job done. Our top artificial lighting tools for photography are set out below.
A flashgun mounted to your camera
This is a popular option, but you’ll want to experiment with this to make sure it suits your aesthetic. The direction of the flash will have a drastic impact on your work, so try a few different angles.
Remember that whatever you point the flash at will turn out bright and saturated, while everything else will be dark in contrast. So, if you aim the flash at your model, you’ll end up with dark shadows and bright highlights – an effect you’ll see in many fashion magazines!
A flashgun or speedlight with a rotating head
To dial down the contrast, you can explore “bouncing” your flash using one of these tools. This means pointing the head of your flashgun or speedlight to a wall or ceiling first so the light “bounces” off that and falls naturally on your subject. This diffusion technique will leave you with a look that’s somewhat similar to natural lighting.
A strobe or portable LED light
For the most flattering light, position your strobe or LED light above and at a 45-degree angle to your model. This will illuminate your model and make a world of difference when it comes to reducing shadows and taking crisp, bright photos.
Bonus Tip: If you go down the LED lighting route, buy a kit with ‘soft’ bulbs. These will diffuse light and help you to capture fashion photos with clean, crisp colours.

3. Go all out with a studio lighting setup
If you have room in your budget and home, consider investing in a home photo studio lighting setup to take your photos to a new level. For fashion photography, this usually involves two or three powerful studio lights, as well as a backdrop for the model to pose in front of.
To nail your indoor lighting setup, consider using a three point lighting setup or, in other words, a triangle of light. Here’s how to set up photo studio lighting at home:
- Choose one strong light as your main light source and position it at a 45-degree angle in front of the model. This is known as the key light.
- Place a second light at a 45-degree angle on the other side of the model. This light functions as a fill light to eliminate harsh shadows and stop them from ruining the photo (and the shoot!).
- Position the third light at the rear of the frame. This backlight will leave you with a white or light-grey backdrop, and add highlights to the model’s hair and clothing.
You can change the effects of your DIY home photo studio lighting by simply moving the lights closer to, or further from, the model. You can also mix up their positioning to see if a different angle works better for your shoot.
Bonus Tip: Studio lights aside, you can use other light shaping tools to boost the quality of your photos. For example, a softbox creates a soft, natural light and directs it to your subject, while an umbrella spreads diffused light and mimics natural outdoor lighting.

Start improving your fashion photography at home
Even if you’re shooting at home, there are plenty of lighting options available, from natural and artificial light to full-blown studio lighting. Ultimately, the best setup comes down to your style of photography, your equipment, and how much space you have.
Follow our indoor lighting tips above to start taking great photos now, but remember that there are no hard-and-fast rules: Half of the joy of photography is experimenting, after all.
Happy photographing!
Written by Ted’s Cameras